If you’re intrigued by the concept of how to build a portable speaker box, you may find that using wood as your material of choice offers the perfect blend of sound quality and portability. Not only does a wooden speaker box allow you to tailor the design and acoustics to your preferences, but it also provides the opportunity to create a piece that’s both high-performing and aesthetically pleasing. Building a speaker box from scratch might seem daunting at first, yet it’s a rewarding project that can yield excellent sound quality and a sense of personal accomplishment.
Preparing for Your Project
Tools and Materials Needed
Embarking on a project how to make a speaker case with your own hands requires preparation. Gathering all the necessary tools and materials is a critical step toward ensuring your project runs smoothly. Here’s a comprehensive list to get you started on your DIY audio adventure:
- Wood (MDF or Plywood)
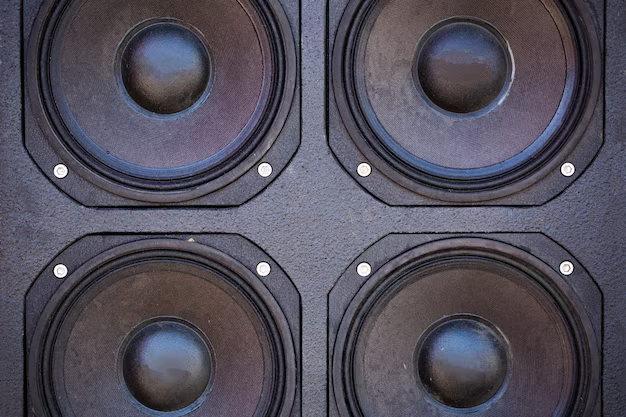
- Speaker drivers (woofer, tweeter)
- Acoustic foam or dampening material
- Wood glue and screws
- Wire and binding posts
- Wood saw (hand saw or circular saw)
- Drill and bits
- Soldering iron and solder
- Varnish, paint, or wood stain
- Sandpaper
- Measuring tape and ruler
Understanding Speaker Box Design
What is the best way to make speakers resonate with the sound you love? It all begins with selecting the right design, balancing your acoustic desires with the technical specifications of your equipment. Various speaker box designs—sealed, ported, bandpass, to name a few—bring different acoustic characteristics to the table. Ensuring that your chosen design complements the specifications of your speaker drivers is key to achieving the best sound quality.
Here’s a brief table to summarize the design differences which plays a pivotal role in the manufacturing of the speaker housing:
| Design Type | Acoustic Characteristic | Ideal For |
|---|---|---|
| Sealed | Tight, accurate bass | Listeners who prefer clarity over raw power |
| Ported | Enhanced bass output | Those who enjoy a robust bass presence |
| Bandpass | Superior low-frequency performance | Enthusiasts looking for specialized bass applications |
Building the Speaker Box
Measuring and Cutting the Wood
An accurate speaker box starts with precise measurements. Plan the dimensions of your box based on the driver’s specifications and the desired net internal volume to create a portable speaker box that not only sounds great but is also easy to transport. Once your plans are in place, measure and mark the wood panels meticulously. Double-check all measurements before making the first cut, as precision at this stage is crucial for the final quality of your speaker box.
Tips for Accurate Cutting
- Use a guideline for each cut to ensure the blade stays on track.
- Keep the saw steady and cut at a consistent speed for the cleanest edges.
- After each cut, handle the wood carefully to prevent chipping or cracking.
Once the wood is cut, the transformation from a simple panel to a resonating chamber begins. This step is a blend of technical skill and artistry, requiring a careful approach to produce not just a functional speaker box, but a work of craftsmanship.
Assembling the Box Frame
With the measured and cut panels ready, it’s time for assembly—a pivotal stage in the manufacturing of the speaker housing process. Align all panels to form the box shape considering whether to use glue, screws, or both methods for assembly. If screws are your choice, remember to pre-drill the holes to avoid splitting the wood. Clamps are particularly helpful at this stage, as they keep the panels firmly in place while the glue sets, ensuring a tight and secure bond.
Gluing vs. Screwing
- Gluing provides a durable, long-lasting bond.
- Screwing offers structural strength and stability.
- Screwing allows for quick and straightforward construction.
Securing the Speaker Drivers
As we proceed to how to make a speaker case with your own hands, attention turns to the drivers—the core of your speaker’s performance. Cut holes for each driver meticulously according to their frame size, and secure them in place with precision. Use screws that are just the right length to ensure a firm fit without threatening the integrity of the drivers. Employing a sealant such as a rubber gasket or foam can greatly enhance the air-tightness of the box, contributing positively to the sound output.
Customizing Your Speaker Box
Once the basic structure of your speaker box is assembled, customization is where you can truly make it your own. It’s not just about aesthetics; customizing also significantly affects how your speaker will sound.
Adding Acoustic Damping
Improve the sound quality of your speaker box through internal damping, which minimizes unwanted resonances within the box. Materials such as acoustic foam, fiberglass, or wool can be used to line the internal walls. Here’s how you can go about it:
- Measure the internal surface areas of your speaker box.
- Cut the damping material to fit these measurements.
- Attach the material to the inside walls using an appropriate adhesive, making sure to avoid covering the port openings in ported designs.
A well-damped speaker box can control the vibrations within the box and help produce a cleaner, more focused sound. Be mindful of the amount of damping material you use—a balance is necessary, as too much can over-damp the sound and too little might not be effective.
Finishing Touches: Painting and Staining
The final appearance of your speaker box can reflect your personal style and complement the room it will occupy. Whether you prefer a natural wood finish, a vibrant paint job, or a sophisticated stain, the finishing touches are essential. For staining or painting, follow these general steps:
- Sand the exterior to a smooth finish, starting with coarse sandpaper and working your way up to a fine grit.
- Apply a primer if you are going to paint, or a pre-stain conditioner if you are staining.
- After the primer or conditioner has dried, apply your choice of paint or stain, finishing with a protective coat of lacquer or varnish.
When applying finishes, always do so in a well-ventilated area, and follow the manufacturer’s instructions to ensure the best outcome.

Finishing Up
Mounting the Electronic Components
After your box is looking good and structurally sound, it’s time to mount the electronic components. This includes not only the speakers themselves but also any crossovers, connectors, or ports that your design requires. Carefully place these components into their respective positions within the box, securely fastening them. Remember, the integrity of these connections will affect your speaker’s performance, so it’s crucial to ensure they are solid and reliable. Double-check all connections, looking to see if soldering is neat and that there’s no risk of short-circuiting.
Testing Your Speaker Box
Before you declare your project finished, testing is essential. Connect your new speaker box to an amplifier and play a variety of music to test different frequencies and volume levels. Listen for any distortions, rattles, or other irregularities. If any issues arise, go back and ensure everything is assembled and secured properly. Sound testing not only guarantees that your speaker is working as expected but also provides the satisfaction of experiencing the fruits of your labor.
Conclusion
The journey from raw materials to a crafted wooden speaker box is both challenging and rewarding. It combines the precision of woodworking with the science of acoustics to create something that is both functional and personal. We’ve covered everything from the initial considerations and assembling the box to the final testing of your creation. With perseverance and attention to detail, you should now have a wooden speaker box that not only sounds great but also resonates with your sense of achievement in DIY crafting.
FAQs
Q1: What wood is best for building a speaker box?
A1: Medium-density fiberboard (MDF) is commonly used due to its density and consistency, which helps reduce resonance. Plywood is another option, offering more aesthetic grain patterns but potentially varying in density.
Q2: How thick should the wood be for a speaker box?
A2: A thickness of ¾ inch (19 mm) is standard for most speaker boxes, providing a good balance between strength and acoustical properties.
Q3: Can I use any type of wood glue for assembling my speaker box?
A3: It is best to use a wood glue designed for woodworking, as it is made to bond wood fibers tightly and provides a strong joint after drying.
Q4: Do I need to use a sealant around the driver installation area?
A4: Yes, using a rubber seal or foam gasket around the driver can help create an airtight seal, which is vital for optimal sound quality.
Q5: How can I ensure my speaker box has the best sound quality?
A5: Key factors for good sound quality include the use of the right internal volume and dimensions according to the speaker driver specifications, proper use of damping materials, an airtight seal around the drivers, and a securely assembled structure to prevent vibrations and sound leakage.